home


    Page 1

    Page 2

    Page 3

    Back to 'tech. help'


    The sense and non sense of Emission testers continued (Diesel)

    This article aims to dispell some of the myths that seem to be around emission testers.


    Article No. 56 Page 2/3
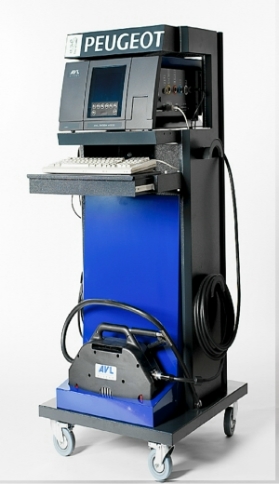
    AVL 4000 PEUGEOT OEM testerclick for AVL 4000 emission tester info


    K Value

    The answer was to make a reading that would give the same results no matter what tester or measurement chamber length you use, the K value.
    The value is derived from the opacity percentage and opacity chamber length and is through the Beer Lambert equation transformed into an absorption coefficient. The K is from the German word 'Koefficient', which means coefficient.

    Every equipment manufacturer has its own ideas on what length of measurement chamber works best, a long one works well with modern Diesel with very low opacity percentages, where a short tube works well with heavy emitters and commercial Diesels. The value displayed on the screen should be the same K value in anycase.


    In the picture above the relation is shown between the Opacity percentage and the absorption coefficient (K).

    Calibration

    In order to get stable and relaible readings the tester needs to be calibrated.
    All ETNZ approved Diesel emission testers of any brand perform an automatic zero calibration. The tester will switch from measuring mode to zero calibration mode which will take up to 30 seconds. The zero calibration is done at least once a day or when negative values are being measured.
    A negative value will be measured when a zero calibration has been performed with dirty or 'foggy' lenses. The tester will 'see' clear when the dirt moves or when the 'fog' clears. The value measured is now 'less than zero', which is not possible. A zero calibration will now be performed.
    The zero calibration needs to be done away from a running vehicle or other emissions which could affect the opacity.

Calibration graph
A = off set calibration error (calibration agent only)
B = correct calibration
C = Zero calibration off set


    Every twelve months the tester's offset has to be calibrated by an ETNZ authorised calibration facility. Many tester faults are the result of incorrect calibration or the lack of calibration.
    All testers will have some 'drift' over time. Drift is where the actual opacity is not displayed correctly anymore for a multitude of reasons. The drift needs to be calibrated away to be sure that the actual displayed value is true, with a calibrated set of factory supplied opacity lenses.

    Warm up

    The light source and measuring tube in the tester will have to warm up to stabilise the measurement.
    The measuring tube needs to be at operating temperature as the light absorption is affected by temperature. The heating of the measurement chamber needs to get up to a reasonable exact temperature. The temperature control is done by the tester's electronics. The temperature needs to be stabilised before a measurement can be performed.
    The warm-up period of the tester needs to be respected and can not be by-passed.
    The most efficient way is to turn the tester on at the beginning of the day and leave the tester on all day. Switch it off at night. Most testers have a stand by function, where internal high current devices are switched off, but where the light source and measuring tube heater stay on and are kept continuously stabilised.


    Different measurment methodes ...

    Continued..


    Back to 'tech. help'


    Back to 'Welcome'